Showing posts with label free pattern. Show all posts

Wednesday, January 7, 2015

Ewok Sweaters

Ewok sweaters:

Supplies:

US 2 needles
Sock yarn
4 stitch markers
Closures (snaps, Velcro, etc.)
Darning needle
Ewoks

Notes:
In a mix bag of Star Wars Ewoks that was purchased from a flea market I noticed there were 3 varieties.  The sweaters are generally the same for all three, but changes may be needed depending on the neck, body or arm length. Patterns have not been thoroughly tested. Ewok 2 I will be making more than once so I will update if I find anything major.
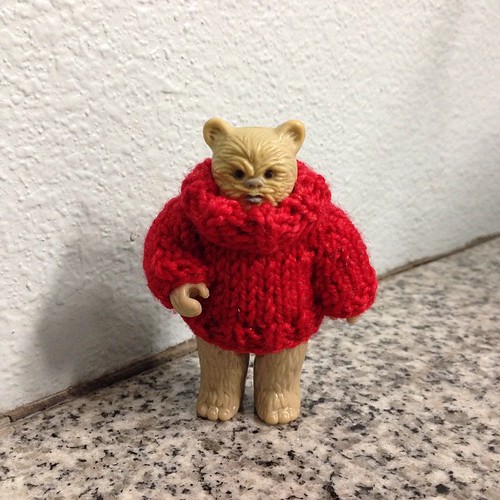
Ewok 1 (1985 Lumat)-

CO 16

K1 x P1 rib for 6 rows
                Work stitches as they appear on the wrong sides.

Work the 6th row of rib- Raglan set up K3, pm, K3 pm, K4, pm, K3, pm, K3

Start increases by knitting 1 stitch before maker, KFB, sl m, KFB, repeat to the end. (24 sts)

Purl to end.

Repeat Raglan increases.  (32 sts)

Purl to end.

Repeat Raglan increases. (40 sts)

Purl to end.

Knit to first marker.  Remove marker and place stitches between the markers on scrap yarn.  These are the sleeves.  Knit to the next marker and repeat.

Starting on the wrong side St. st. for 3 rows.

K1 x P1 rib for 2 rows.

BO in rib pattern.

Sleeves-

Place stitches back on the needles. Pick up 1 stitch on each side of the ends. 

St. st. for 3 rows. 

*K2tog, K2* to the last stitch, K1. 

K1 x P1 rib pattern.

BO in rib.

Repeat for the second sleeve.  Seam up and stitch up any holes under the arm.  Weave in ends and sew on closure.  To keep the roll neck collar down, I tacked it on the purl rows when weaving in ends.

Ewok 2 (1983 Ewok Medicine Man and 1984 Teebo)-

CO 18

K1 x P1 rib for 4 rows.
                Work stitches as they appear on the wrong sides.

Work the 4th row of rib- Raglan set up K3, pm, K3 pm, K6, pm, K3, pm, K3

Start increases by knitting 1 stitch before maker, KFB, sl m, KFB, repeat to the end. (26 sts)

Purl to end.

Repeat Raglan increases.  (34 sts)

Purl to end.

Repeat Raglan increases. (42 sts)

Purl to end.

Knit to first marker.  Remove marker and place stitches between the markers on scrap yarn.  These are the sleeves.  Knit to the next marker and repeat.

Starting on the wrong side St. st. for 4 rows.

K5, KFB, knit to the last 6, KFB, K5.

K1 x P1 rib for 2 rows.

BO in rib pattern.

Sleeves-

Place stitches back on the needles. Pick up 1 stitch on each side of the ends. 

St. st. for 3 rows. 

*K2tog, K2* to the last stitch, K1. 

K1 x P2 rib pattern.

BO in rib.

Repeat for the second sleeve.  Seam up and stitch up any holes under the arm.  Weave in ends and sew on closure.  To keep the roll neck collar down, I tacked it on the purl rows when weaving in ends.

Coming soon Ewok 3 (1983 Chief Chirpa).

Copyright by Natalie Scrimshire, 2015.

Please do not sell pattern or product made from pattern.

Friday, July 13, 2012

Halter Top for Bltyhe

Halter Top for Blythe

By Natalie Scrimshire
Supplies:

US 2 needle
Sock weight yarn
darning needle
scrap yarn

CO 20 stitches, knit flat
St. st. for 12 rows

**K2, SSK K to the last 4 sts., K2tog, K2

Purl**

Repeat from ** to ** 2 more times.

Wrong side- Knit (will be a purl ridge on the front)

Right side of top-

SSK, K3, K2tog, turn (no wrapping)

Purl

SSK, K4

Purl

Knit

Purl

SSK, K2

Purl

Knit

Purl

SSK, K1

Tie-

St. st. until desired length.  Last row, K2tog and pull yarn through.

Left side of top-

SSK, K3, K2tog

Purl

K4, K2tog

Purl

Knit

Purl

K2, K2tog

Purl

Knit

Purl

K1, K2otg


Tie-

St. st. until desired length.  Last row, K2tog and pull yarn through.

Back-

Pick up 11 stitches on the back right side (you will be knitting sides ways on the garment)

St. st. for 15 rows

BO and sew to the opposite side.  Weave in ends.

Happy knitting! If you have any questions leave a comment or email me at blytheknits@gmail.com

Copyright by Natalie Scrimshire, 2012


Sunday, March 6, 2011

Crafty Fire for Blythe

Crafty Fire for Blythe

Supplies:

US 1 DPNs
Blue fingering weight yarn
Darning needle
Crochet hook

Note- To start out I use an i-cord on the first round.

CO 3 (make sure to have a long tail)  in the round

*KFB* every stitch. = 6 sts.

*KFB* every stitch. = 12 sts.

Knit 3 rounds.

*SSK, K2* all around. = 9 sts.

Knit 1 round.

*SSK, K1* all around.  = 6 sts.

*SSK* all around.  = 3 sts.

Pull yarn through remaining stitches and weave in end.

Fire Petals, knitted flat-

Using the CO tail, pick up 2 stitches.

KFB the 2 stitches.

SSK, K2tog

P2tog

Pull yarn through the stitch and weave in ends.

Repeat a second time for another petal.

Attach new yarn and chain stitch a loop big enough to fit Blythe's hand.

Have fun!


Copyright by Natalie Scrimshire 2011


This is for personal use only.  Please do not sell pattern. I can be reached at nscrimshire@gmail.com or at Ravelry user name- PandoraPhelps. Check me out on Etsy!  BlytheKnits

Hermione's Crafty Fire Knitting Pattern


Hermione's Craft Fire Knitting Pattern

Supplies:

US 5 DPNs
Blue worsted weight yarn
Darning needle
Polyfil

CO 6 stitches in the round.

KFB every stitch. = 12 sts.

KFB every stitch. =24 sts.

*K1, KFB* all around. = 36 sts.

Knit for 6 rounds.

*K1, SSK, K6, K2tog, K1* all around. = 30 sts.

Knit for 3 rounds.

*K1, SSK, SSK, K5* all around.  = 24 sts.

Knit for 2 rounds.

*K4, K2tog, K2tog* all around. = 18 sts.

Knit for 2 rounds.

*SSK, K2, K2tog* all around. = 12 sts.

*SSK* all around. = 6 sts.

 Lightly stuff the bottom with polyfil. Cut yarn and pull through remaining stitches. Weave in ends.

Fire Petals, knit flat:

CO 3

KFB, K1, KFB

Stocking stitch for 3 rows.

SSK, K1, K2tog

Purl

SSK, K1

P2tog

Pull yarn through remaining stitch and weave in ends.

CO 3

KFB every stitch

Purl

KFB, K4, KFB

Stocking stitch 3 rows.

SSK, K4, SSK

Purl

SSK, K2, SSK

Purl

SSK, SSK

P2tog

Pull yarn through remaining stitch and weave in ends.

Stitch the fire petals to the bottom of the main fire.

Now you have created a magical fire!


Copyright by Natalie Scrimshire 2011
This is for personal use only.  Please do not sell pattern. I can be reached at nscrimshire@gmail.com or at Ravelry user name- PandoraPhelps.  

Check out me on Etsy! BlytheKnits


Wednesday, February 2, 2011

Welcome Home Outfit for Petite Blythe

Welcome Home Outfit for Petite Blythe


Supplies:

US 1 DPNs

Sock weight yarn

4 stitch markers

Darning needle

Scrap yarn

Velcro

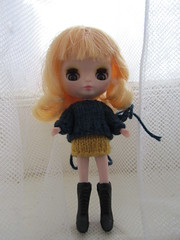
Sweater:

CO 15

Place marker at 3, 2, 5, 2 3

Row 1- KFB before and after every maker

Row- Purl all stitches

Repeat 1 and 2 once more or until there are 6 sleeve stitches.

Knit to the sleeves and place them on scrap yarn and do the same for the second one.

Stocking stitch for 6 rows.

K1 x P1 for 1 row

BO in rib and weave in ends.

Sew on Velcro for closure.

Sleeves x 2-

Place the 6 stitches back on the needles and pick up 2 at the armpit.

Knit for 5 rounds.

K2tog, knit the rest.

K1 x P1 for 1 round.

BO in rib and weave in ends.
Skirt:

CO 20

Knit for 6 rounds.

Decreasing-

*K1, SSK, K4, K2tog, K1* twice.

Knit for 1 round.

K1 xP1 for 1 round.

BO in rib and weave in ends.

Wondering why this pattern is called Welcome Home Outfit? Check out my dolly blog with the story about Applesauce, who is the model.

Copyright by Natalie Scrimshire 2011

This is for personal use only. Please do not sell pattern. I can be reached at nscrimshire@gmail.com or at Ravelry user name- PandoraPhelps.


Sunday, January 2, 2011

Girly Chihuahua Dress for Blythe's Pet


Girly Chihuahua Dress for Blythe’s Pet

Supplies:

US 0 needles, either 24+ circular for Magic Loop or DPNs
Fingering yarn
Darning needle
Velcro

Directions:

CO 20
Knit
Purl
Knit
Purl

K2tog every stitch

Purl
Knit
Purl
Knit

On wrong side- backwards CO 15, then purl across the new 15 and old 10 stitches.

K9, K2tog, BO 14
Purl

K1, K2tog, K4, SSK, K1

Purl
Knit

Backwards CO 10 and join in the round.

Knit 2 rounds.

BO purlwise loosely and weave in ends.

Stitch or fabric glue on Velcro to attach the belly strap to the topside of the dress.
Copyright by Natalie Scrimshire 2011
This is for personal use only.  Please do not sell pattern. I can be reached at nscrimshire@gmail.com or at Ravelry user name- PandoraPhelps

Saturday, January 1, 2011

Party Dress for Blythe

Party Dress for Blythe

Supplies:

Fingering or sport weight yarn
US 2 DPNs
Darning needle

Directions:

Starting bottom up-

CO 30

Seed stitch for 2 rows.

Knit 1 round.

*K2, KFB,* repeat to the end.

Knit 1 round.

*K1, KFB,* repeat to the end.

Knit multiple rounds until desired length of skirt.

Decrease-

*K2tog* all stitches.

Knit 2 rounds.

*K2tog, K1, * repeat to the end. = 20 sts.

Knit 3 rounds.

Increasing for the bodice-

Step 1- K4, KFB, K4, KFB, K10
Step 2- K5, KFB, K5, KFB, K10
Step 3- K6, KFB, K6, KFB, K10
Step 4- K7, KBF, K7, KFB, K10
Step 5- K4, KFB, K3, KFB, K4, KFB, K3, KFB, K2, SSK, K2, K2tog, K2
Step 6- K5, KFB, K4, KFB, K5, KFB, K4, KFB, K2, SSK, K2tog, K2

Knit 1 round.
Seed stitch for 2 rounds.  BO on the second seed stitch round and weave in ends.

Copyright by Natalie Scrimshire 2011
This is for personal use only.  Please do not sell pattern. I can be reached at nscrimshire@gmail.com or at Ravelry user name- PandoraPhelps

Thursday, November 11, 2010

Petite Dresses for Petite Blythe

Petite Dresses for Petite Blythe
Supplies:
US 2 needles
DK weight yarn
Yarn darning needle
Notes: This is a formula that gives you general guide lines to construct a Petite Blythe Dress.  It can be completely customizable.  Make sure to cast on extra yarn to use as a tie.
Instructions:
CO 11
Work 2 rows.
Work 4 sts, YO, work 3 sts, YO, work 4 sts; this should be on right side.
Work 5 more rows (less or more to your desired style).
Increase on right side as many or less as you prefer.
Work shirt rows to your preference.
BO on wrong side.
Stitch up the skirt portion until it is sufficient space to slip the body inside the dress. Weave the stitching yarn up to the neck. Anchor and use as a tie.
Want more specific instructions?


Pink Example                                                   
CO 11
Garter st for 2 rows
K4, YO, K3, YO, K4
St st for 5 rows
*K1, KFB* repeat to end. (I ended with a K1)
Garter stitch for ¾”
BO on wrong side

Stitch up and create ties.


           Grey Example

CO 15
Knit
Purl
K4, YO, K7, YO, K4
Purl
Knit
Purl
*K2, M1, K2* repeat to end.
St st for 1 1/4 inch.
BO on wrong side.

Stitch up and create ties


Copyright by Natalie Scrimshire 2010
This is for personal use only.  Please do not sell pattern. I can be reached at nscrimshire@gmail.com or at Ravelry user name- PandoraPhelps

Friday, August 20, 2010

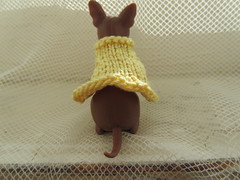
Chihuahua Sweater for Blythe’s Pet, 2.0

Chihuahua Sweater for Blythe's Pet, 2.0


Pattern Notes:  This sweater is essentially the same pattern just a little longer.  It was how I originally wrote the first sweater, but I thought it was look better shorter.  I tested the pattern and I liked both.

Supplies:

DPNs US 2 or 3s

fingering yarn with elastic

darning needle

Directions:

CO 12

Rib K1x P1 for two rounds.

*K3, KFB,* all around.

*K4, KFB,* all around.

K1, YO, K4, YO, K1, K all around.

K2 rounds.

Rib K1 x P1 for two rounds.

BO and weave in ends.


Copyright by Natalie Scrimshire 2010


This is for personal use only. Please do not sell pattern. I can be reached at nscrimshire@gmail.com or at Ravelry user name- PandoraPhelps

Wednesday, August 4, 2010

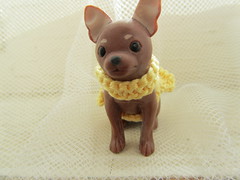
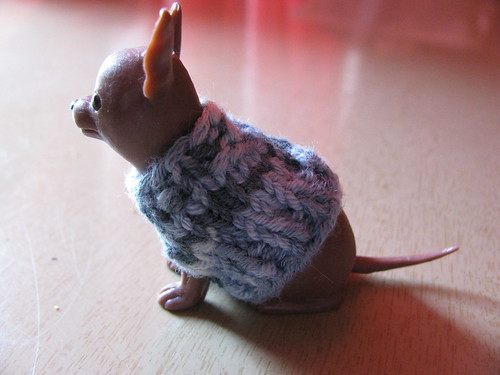
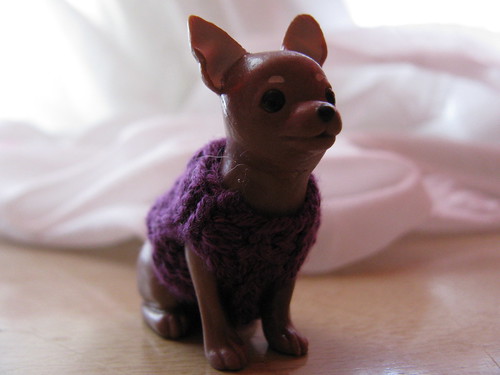
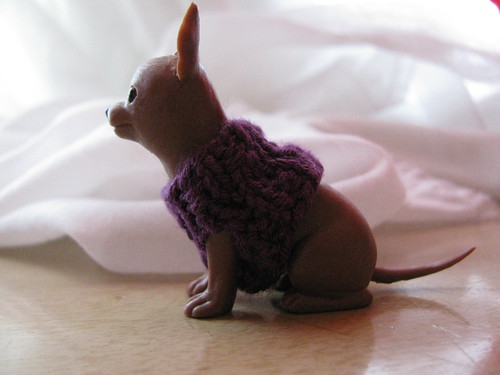
Chihuahua Sweater for Blythe’s Pet


 Supplies:

US 2 DPNs

Fingering weight yarn with elastic

Darning needle

Pattern Notes:

This pattern is designed for the Chihuahua that came with the Simply Mango set. Yarn with elastic is needed to help with getting the sweater on and off of the miniature.

Instructions-

CO 12

K1 x P1 rib stitch for two rounds.

*K3, KFB,* all around.

Knit 1 round.

K1, double YO, K2tog, K2 double YO, K2tog, K all around.

Knit 1 round. *Purl the second loop of the double YO. *

K1 x P1 rib stitch for two rounds. *The rib did not come out even, add a stitch if you like.*

BO and weave in ends.


Copyright by Natalie Scrimshire 2010


This is for personal use only. Please do not sell pattern. I can be reached at nscrimshire@gmail.com or at Ravelry user name- PandoraPhelps

Thursday, July 15, 2010

My 3rd Blythe is in Route!

I just tracked my 3rd Blythe doll.  She was reciding in Missouri just one state above me and she is in route!  I have already named her, Fleur. Okay, okay, I will admit it.  I am naming them after Harry Potter characters- Penelope Clearwater, Ginny Weasley, and Fleur Delacour.  It is more of just inspiration, not really after the characters themselves and I dropped the last names.

If I ever get Simply Guava, which will be my last Blythe for the year, her name will be Nymphadora.  With pink hair I think it is fitting. I wished that I would have held off on my Simply Mango because now they can be order together with a discount at This is Blythe. 

I did just order some wigs.  This will be intersting.  They are cute and I hope they fit my Takara as well as Ashtond Drakes. I ordered 2 wigs and got one free, a wig cap, an outfit on sale and a re-ment (call me stupid, but I this means reproduction) Little Twin Stars charm set with free shipping.  This is officially the last I can spend on my Blythes, especially with Christmas just months away.  In fact, I am feeling a little guilty for spending the money. 

I plan to take some photos this weekend with the clothing that I have made for them.  I hope to write a few more patterns too.  I can visualize this shrug that I want to make but the yarn is not corporating or the lace or the needles....  I guess I may have to rethink it completely.  I also have a project idea still in the works.  It might be my first for sale pattern.  It will be useful for dolls or needles....what a combination!

Tuesday, July 6, 2010

Shark Hat for Blythe

Doesn't every doll need a Shark Hat?  Well, yes.  This pattern has only been tested once.  I will soon test it again.  It is very likely a flaw or two in my pattern writting skills.


download now

REVISED!


Copyright by Natalie Scrimshire 2010

This is for personal use only. Please do not sell pattern.

I can be reached at nscrimshire@gmail.com or at Ravelry user name- PandoraPhelps.


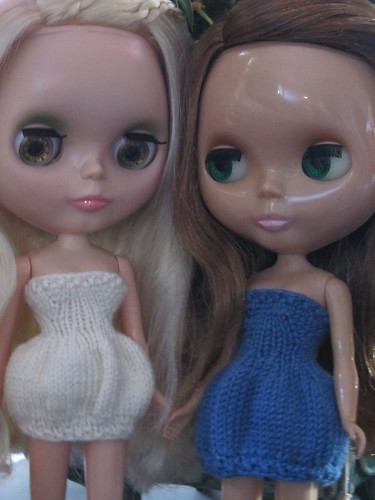
Bulb Skirt for Blythe


Blythe is the perfect doll to knit for, she is so versatile and everything looks good on her.  This is one of the first items I knitted for my Blythe named Ginny, a Bulb Skirt. It is a quick and simple knit.  A perfect beginner magic loop pattern!

Bulb Skirt

Supplies:


US 2 DPNs or US 2 24 inch Circular needles
Fingering weight yarn with elastic
Yarn darning needle

Pattern notes:

Skirt is knitted bottom up. Add ribbing to the waist in the 3 rows before the bind off if yarn does not have elastic. This is a perfect beginner Magic Loop project. Just divide stitches evenly on the needles.

Instructions:

Co 40

Knit 1 round.

Increasing-

*K1, KFB,* repeat to the end.

Knit multiple rounds until desired length.

This example has about 18 rounds.

Decreasing-

*K2tog,* all around.

Knit 2 rounds

*K2tog, K1,* repeat to the end.

Knit 3 rounds.

BO loosely and weave in ends.

Copyright by Natalie Scrimshire 2010

This is for personal use only. Please do not sell pattern. I can be reached at nscrimshire@gmail.com or at Ravelry user name- PandoraPhelps

Thursday, July 1, 2010

Dyeing yarn

I recently have been attempting to dye cotton yarn with kool-aid and gel food coloring. First attempt was awful. My color washed out. Right now my second attempt is in the works. Sometime this weekend I am going to get a tie-dye kit. I do plan to purchase real dyes but I want to practice on inexpensive products first.

I even thought about dyeing wools. I can wear gloves and mask if the fibers irritate me skin. I think it would be okay.

On Ravelry I have gotten myself set up as a designer. Hopefully I will soon get all of that figured out. Right now I am working on some Blythe doll patterns to publish- the Shark Hat is one and the other a Bulb Skirt. My friend told me that they are also called Tulip Skirts. I will post the patterns here and on Ravelry.

Sunday, September 13, 2009

Baby Hat for Churro Mitts


Churro Hat

US 6 DPNs

Worsted weight yarn

CO 48 (16 sts on 3 needles)

K2, P2 all sts for 3 inches.

K2tog, P2 all sts

K1, P2 all sts for 1 inch.

K1, P2tog all sts

K1, P1 all sts.

K2tog all sts.

K2tog all sts. (6 sts)

Pull thread through remaining stitches and weave in ends.

Copy written by Natalie Scrimshire, 2009. Feel free to use this pattern for charity. Please do not sell my pattern.

Thursday, September 10, 2009

Chihuahua

Chihuahua

*Download Pattern*

Note: Long story short, this pattern was to designed by knitting through the back loop on every knit stitch.  There is a person on Ravelry who knitted it with the "normal" knit stitch just fine though.  30 June 2010

To find help with knitting techniques, I suggest this website http://www.knittinghelp.com/.

Legs x 2

CO 6 and join the round.
R 1 (KFB, K1) 3 times (9sts)
R 2-11 K all
R 12 K9, backwards CO 2 sts (11sts)
Divide the stitches up, 6 on one side 5 on the other to prepare for Magic Loop. Repeat steps 1-12 for second leg. In total, there should be 22 sts.

Magic Loop Body and Head

R 1-2 K all
R 3 (KFB, K10) 2 times (24sts)
R 4-9 K all
R 10 (K2TOG, K10) 2 times (22sts)
R 11 K all
R 12 (K9, K2TOG) 2 times (20sts)
R 13-14 K all
R 15 (KFB, K8, KFB) 2 times (24sts)
R 16-22 K all
R 23 (K2TOG, K10) 2 times (22sts)
Turn head inside out and do 3 needle BO.

Ears x 2

CO 12 and join the round.
R 1-4 K all
R 5 (K2tog, K2) 3 times (9sts)
R 6 K all
R 7 (K2TOG, K1) 3 times (6sts)
R8 (K2TOG) 3 times (3sts)
Pull thread through last 3 stitches with darning needle and weave in ends.

Muzzle

CO 6 and join the round
R 1 K all
R 2 (KFB, K1) 3 times (9sts)
R3 K all
R 4 BO
Arms x 2
CO 6 and join the round
R 1 (KFB, K1) 3 times (9sts)
R 2-10 K all
R 11 BO

Tail

CO 6 and join the round
R 1-9 K all
R 10 (K1, K2TOG) 3 times (3sts)
Pull thread through the last 3 stitches with darning needle and weave in ends.

I finish the Chihuahua in this order:
1. 1. Stuff and sew up body
2. 2. Place and sew the ears on the corners that are created by the 3 needle BO.
3. 3. Sew the muzzle on according the placement of ears. (I stuff it slightly with left over yarn.)
4. 4. Sew the arms on the shoulders. (This area is defined by Round 15 of the body and head.)
5. 5. Sew the tail on!

I will post my other chihuahua photo's soon!
This pattern is untested except by me. Please email me with questions at pandoraphelps@gmail.com.

This is my pattern, please do not abuse it by selling it. It is free to all dog and toy lovers.
Copywritten by Natalie Scrimshire 2009

T

Chihuahua- Odd Bod version

Chihuahua


You Need:

US 6 or fit your yarn (straight)

1 US 6 DPN or scrap yarn, safety pin, stitch holder.

Plymouth Baby Alpaca Worsted (I feel this yarn is more of a DK)

Misti Baby Alpaca DK for color details

Stuffing

Darning needle

Eyes- buttons, felt, safety eyes

Body (Make 2, one in reverse)

Note: Change colors according to your pet’s markings or get creative!

CO 25

Rows 1-9 St st.

Row 10 K, K2TOG, K to last 3 st, K2TOG, K1

Row 11-14 St st

Row 15 K20, Slip 5 to DPN, scrap yarn, stitch holder, etc.

Row 16 (Remaining 20 st) K1, K2TOG, K11, K2TOG, K1

Row 17 Purl

Row 18 K1, K2TOG, K9, K2TOG, K1 (13)

Row 19-25 St st

Row 26 P1, INC, P9, INC, P1 (15)

Row 27 knit

Row 28 P1, INC, P11, INC, P1 (17)

Row 29 knit

Row 30 P1, INC, P13, INC, P1 (19)

Row 31-34 St st

Row 35 K1, K2TOG, K13, K2TOG, K1 (17)

Row 36 P1, P2TOG, P11, P2TOG, P1 (15)

Row 37 K1, K2TOG, K9, K2TOG, K1 (13)

Row 38 P1, P2TOG, P1, P2TOG, P1, P2TOG, P1, P2TOG, P1 (9)

Row 39 BO

Reverse for Back side of Chihuahua.

Tail

Place stitches back on to a needle

Row 1 k

Row 2 purl

Row 3 K2TOG, K3, backwards CO 1

Row 4 purl

Row 5 K2TOG, K3, backwards CO 1

Row 6 purl

Row 7 K2TOG and BO

Base

CO 25

Row 1 purl

Row 2 K1, INC, 21, INC, K1 (27)

Row 3 purl

Row 4 K1, K2TOG, K21, K2TOG, K1 (25)

Row 5 BO

Ears (make 2)

CO 10

Row 1-4 St st 4 rows

Row 5 P1, P2TOG, P4, P2TOG, P1

Row 6 K1

Row 7 P1, P2TOG, P2, P2TOG, P1

Row 8 K1, K2TOG, K2TOG, K1

Row 9 P2TOG, P2TOG

Row 10 K2TOG

Pull thread through last stitch.

DO REVERSE FOR 2ND EAR

Nose

I know this is odd, but it worked.

CO 15

Row 1 purl

Row 2 knit

Row 3 P1, P2TOG, P9, P2TOG, P1

Row 4 K1, K2TOG, K6, K2TOG, K1

Row 5 purl

Row 6 knit

Row 7 purl

Row 8 knit

BO

I folded it in on the sides until it looked like a dog’s muzzle and then stitched it together. Because of the fold, you don’t have to stuff it.

Sewing:

Sew front and back of chi together starting from one side to the other.

Then sew bottom on. Leave yourself enough room to stuff the pup and then finished sewing.

I attached the ears and then the muzzle. This way you can align all of the features to your liking.

I sewed on the button eyes last.


Note: This pattern is untested. You may email me at pandoraphelps@gmail.com with questions. This is my pattern, please do not abuse it by selling my pattern. It is free to all dog and toy lovers.

Copywritten by Natalie Scrimshire, 2009.